A large family, homeschooling, adoption, special needs, whatever strikes my fancy, sort of blog.

A large family, homeschooling, adoption, special needs, whatever strikes my fancy, sort of blog.

Monday, February 27, 2017

Mondrian Inspired Art Project


My older kids learned about Mondrian at CHILL, the now-defunct local homeschool co op we belonged to a few years back.  But the younger kids didn't know about him, so when I came across a mention of his work in something I was reading, an idea began to percolate in the back of my mind.

What about a pastel version?


After showing the kids images of Mondrian's works online, I explained that we would be choosing 3 colors for our paint, and a fourth color for our lines to do our projects.


The kids mixed white into our regular paints to create pastel colors.


We used a ruler to draw random lines across our papers in both directions.


Then we painted in some of the resulting squares and triangles.


Some of the kids understood the goal better than others.  Looking at the pictures, I think we could have added more white to most of the colors we made.


The following day, when our paintings were nice and dry, each artist chose a color from our selection of masking tapes to make the thick, Mondrian-esque lines.


This was a fun and easy project, but I learned that I could have provided some additional guidance to make things go more smoothly.  Next time around, I'll limit the number of lines the children draw, and be sure to suggest that they keep them at least ruler's width apart from each other.  I'll also make the paint colors lighter so they don't "bleed through" the light colored tape.  And finally, I'll instruct the children to use strips of tape the entire length or width of their paper and trim the excess from the edges after the project is complete.


Still, this was a fun project, and hopefully when they see the works of Piet Mondrian they'll remember who he was.


This post may be linked up at these linky parties.

Top Mommy Blogs - Click To Vote! Thanks for clicking for us!

Saturday, February 25, 2017

Simple Bird Feeders


In an effort to attract more of our feathered friends to our back yard, we made bird feeders this week!


Supplies:
empty toilet paper tubes
peanut butter
birdseed
a dish with sides
knives to spread the peanut butter
yarn/twine/string


First we spread peanut butter on the outside of the toilet paper tubes.


This is harder for kids than one might think.


It probably would have been slightly easier to use smooth PB instead of chunky.


 But we managed.


Once we got the peanut butter on, the next step is to roll the tube in the birdseed.


Then drop a length of yarn/twine/string into the tube.


Tie the yarn/string/twine into a knot, and you're ready to hang it up!


Josiah helped us with the hanging part, since he's taller than I am.


Hopefully, the birds will enjoy these treats as much as we enjoyed making them!


This post may be linked up at these linky parties.

Top Mommy Blogs - Click To Vote! Thanks for clicking for us!

Our Week with Cool New Toys


We are continuing to learn about birds in our homeschool, including making bird feeders for the back yard.


I got the kids a couple Audubon Society plush birds.  I like these because they make bird noises, which may help the kids recognize different species of bird in the wild.


Let's face it, sometimes I also dislike them because they make bird noises.


But the kids love them, and I wanted them to be able to draw from a 3 dimensional bird, like John James Audubon did in our current read aloud.


One of my artists really struggles with art, so this project was challenging.


I caught the teens, well, teen-ing in the wild.


And the cat, catting.  I was Not Happy with Wheelie when he left 8 puddles of cat puke on my floor the other day.  He's old, and not doing very well these days.


Hey look!  There's another bird!


Since this is the California quail, this should count for social studies and science, right?


This is the time of year where I tend to keep an eye on how much more book we have, versus how much more calendar we have until the teens get out of school.  Katie is actually set to finish her math book in the next couple of weeks.  I'll have to figure out some other book or online program for her to keep her math skills sharp.  Spelling, on the other hand, well, since she was still working on last year's book at the beginning of this year, we're only 16 weeks in to this year's 36 week spelling book.

Out with the old books, in with the new!

Speaking of spelling, these guys hit the half way mark this week!  Spelling You See breaks the year into 2 consumable books, which is nice, 1) so it's not so thick, heavy, and overwhelming, and 2) so you replace a ratty book with a fresh, clean book mid-year.  Jack and Hannah have finished E1 and moved on to E2.  They're currently in week 19, despite the fact that this is week 24 of the school year.  I'm foreseeing some Saturday spelling so we can avoid summer school.


Josiah got a package!


Overkill, much?  He's using a sword, when a pocketknife would do.


It's a light saber!


A really big light saber!


And this makes me so happy.  Spring is popping up all around us.  Should be in the 60s here next week.  The flowers are blooming, the trees are budding.  Warmer times are on the way!


Paul and Josiah are still working on getting Sam's old room spruced up.  Paul shot texture in there this week.


But he says he won't roll out the primer until after the bathroom floor is completely stripped, since that makes a lot of dust.


Back in the school room, the kids did our GeoPuzzle of Asia this week, and a wooden tray puzzle of the United States for geography.


And there's our final bird for the week; the eagle.  We also picked up some different bird books when we went to the library this week.  The kids are turning into voracious readers.

In our personal library, I've started cleaning out some of the books we no longer need.  Only 2 small boxes worth so far, but it's a start.  Next, I'm going to gather up some little boy books and pass those down to Brayden, since my "little boy" becomes a teenager in a few weeks.


This post may be linked up at these linky parties.

Top Mommy Blogs - Click To Vote! Thanks for clicking for us!

Friday, February 24, 2017

Field Trip Friday: Jelly Belly Factory


Yes, we've been to Jelly Belly before.  Less than a year ago, even.  But when the opportunity came to go again, with other homeschoolers, I signed us up.  Because juicy pear and sizzling cinnamon.


This time, it was just my homeschool kids.  In fact, Brianna was a little miffed, because we went on her birthday, while she was in school.


Hannah in the required hat.


And Katie in her hat.  Yes, they wore their Jelly Belly t-shirts from last time.


And Jack in his hat.


There's lots to see on the factory floor.


And the jelly bean mosaics are amazing.  I kind of wanted to buy a few bags of Belly Flops and let the kids try making their own, but thriftiness prevailed.  They sell Belly Flops (slightly imperfect jelly beans) in the gift shop, and you can get 5 bags for $30.  Somehow, with all the other sugar we've been consuming lately, I decided that would be about 4 bags too many, so we ended up getting one bag of Belly Flops ($10) and a bag of camo jelly beans for Sam.  


Fortunately for Katie, there are short windows along the way.  See more mosaics hanging in the the background?


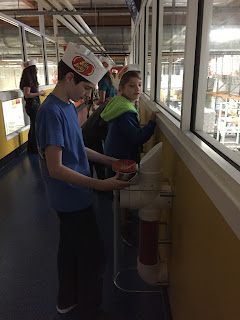
They've added new features since last time we were there.  These tubes emit smells!


There are about half a dozen of them, with different scents that correspond to flavors of popular beans.


More mosaics.  I laughed a little at the Joe Montana one.  My kids have no idea who that is, and I wonder how many people would recognize him.  I mean, Elvis, Princess Di, the Pope, several presidents, and Joe Montana?


But the mosaics are super cool.


They actually send them out to art exhibits around the world now.


Looking down on shelves of dyes that give the jelly beans their pretty colors.


It's hard to capture how truly massive this operation is, but if you think about how high these flats of jelly beans are stacked, and how many stacks there are, just in this one little section, you realize... that's a lot of beans!


One of the other mamas took this picture for me.  It used to be that you were not allowed to take pictures on the tour, but now they just ask you to turn off your flash.


Star Wars jelly bean dispenser.  Jack thought that was pretty cool.


We got to see the guy adding big scoops of powdered sugar to the spinning tumblers of beans.


This robot was hefting and stacking the trays of beans.


Hannah looks out at oodles and oodles of yummy green beans.


Did you know it takes 7-14 days to make a jelly bean??


At intervals along the tour route, there are videos to watch, explaining the process.


Also new since the last time we were here, there are a couple of interactive video games.  These were a huge hit with the kids.


Do you see how pretty this is??  All these different colors poured on a conveyor, passing by.  They're being fed up into a drum that combines them together to create assortments, instead of single flavor packages.


When we took this picture, I laughed and said to another mom, "Proof of socialization!"  That's homeschool humor.  ;)


We looked at a few more mosaics up close in the gallery.


The process has evolved a bit over the years, and what used to take months now takes only 2 weeks for their current artist.


I love the Chinese dragon!  They also had some Year of the ________ sculptures up, but I missed getting pictures of those.


Ronald Reagan, the first president that I remember, was a big fan of Jelly Belly jelly beans, and this fact was responsible for tremendous growth in the company.  They have a display of Reagan memorabilia downstairs between the sample bar and the cafe.


One of the moms found a local park for us to go to after the tour so we could eat lunch and run around.


The kids burned off all their extra energy before getting back in the van for the hour + drive home, and I got to sit on a bench and relax for a while.  Win win.


This post may be linked up at these linky parties.

Top Mommy Blogs - Click To Vote! Thanks for clicking for us!