A large family, homeschooling, adoption, special needs, whatever strikes my fancy, sort of blog.

A large family, homeschooling, adoption, special needs, whatever strikes my fancy, sort of blog.

Tuesday, April 29, 2014

La Leche League Nursing Bra GIVEAWAY


My breastfeeding days are over, but I remember them fondly.  Nursing was a time when I could sit and snuggle my baby/toddler, and know that I was giving them something no one else could.  It was a very special time of bonding.  If you're pregnant or nursing, don't blink.  It goes so fast.  Snuggle that little one and enjoy those endorphins.  Now then, how about a giveaway to celebrate that special relationship?  


Co-Hosted by The IE Mommy

Julie at Tales From A Southern Mom recently reviewed the La Leche League Intimates Nursing bra from Nursing Bra Express. Nursing Bra Express is a great place not only to find great products for mom and baby, but they also offer great nursing resources. If you are nursing or know someone who is this is a great place to start.
You can read the full review here: Nursing Bra Express
Enter below and Good Luck!

TFASM Giveaway Disclosure

If you have any questions or would like to see your product featured on Tales From A Southern Mom please email Julie at julie.talesfromasouthernmom@gmail{dot}com.

Top Mommy Blogs - Click To Vote! Thanks for clicking for us!

ARTistic Pursuits


I've mentioned a couple times that we've been doing more ART than usual lately.  We got the opportunity to try out the ARTistic Pursuits homeschool art curriculum.  They have several different books available, and we got Early Elementary K-3 Book One, An Introduction to the Visual Arts.  Honestly, I think the title is a bit misleading.  My reviewers were in grades 4, 7, and 8, and they were plenty challenged by the materials.  The recommended age is 5 and up, and my 10, 12, and 14 year olds really got a lot out of it.

Book One, which sells for $47.95, is divided into three parts:  What Artists Do, What Artists See, and Where We Find Art.  Since I knew we couldn't finish all 36 lessons in our 6 week review period, I made sure to pull from all 3 sections.

In What Artists Do we learned that artists Compose and Imagine.


I particularly appreciated the instructions for how to use a paintbrush correctly.  Hopefully, I won't have to shriek, "Gentle!" when I see the kids painting any more.


The lessons are structured with a reading, a work of art to look at with questions to answer about it (these help the students really observe a piece, as opposed to just glancing at it), and then a project.


The watercolor crayons quickly became a favorite media.


When blended with a wet paintbrush, they produce lovely results.


We spent several happy sessions, listening to audio drama and doing art.


This piece is one of Eli's, and it depicts the Radiator Springs Racers at Disney's California Adventure.

In What Artists See, we took a look at Shapes.


One of the projects involved cutting shapes from construction paper to create a picture.

In Where We Find Art, I cheated a little bit.  I was so excited to find a Greek Pottery project that we did that one first.


We haven't done clay work before, so this was a very tactile new learning experience.


We made pinch pots!


Using a little water to smooth the sides...


...made for some slimy hands!


It was hard to wait a couple days for the pots to dry and harden sufficiently before the next step.


We used a little water to help the black watercolor crayon glide smoothly on.


We all fell in love with the watercolor crayons.


I never would have tried them if they hadn't been on the materials list!  I didn't know what we were missing out on!


Brianna even made a lid for her pinch pot.


Jack's pinch pot has fierce warriors on it.

Where We Find Art was my favorite section.


The reading part for Art In Caves was fascinating, and our cave drawings were fun to make.


Working with the soft pastels was a little bit messy, but interesting.


You can see the influence of the Brother Bear movie in this piece.  The reddish orange is a hand print.


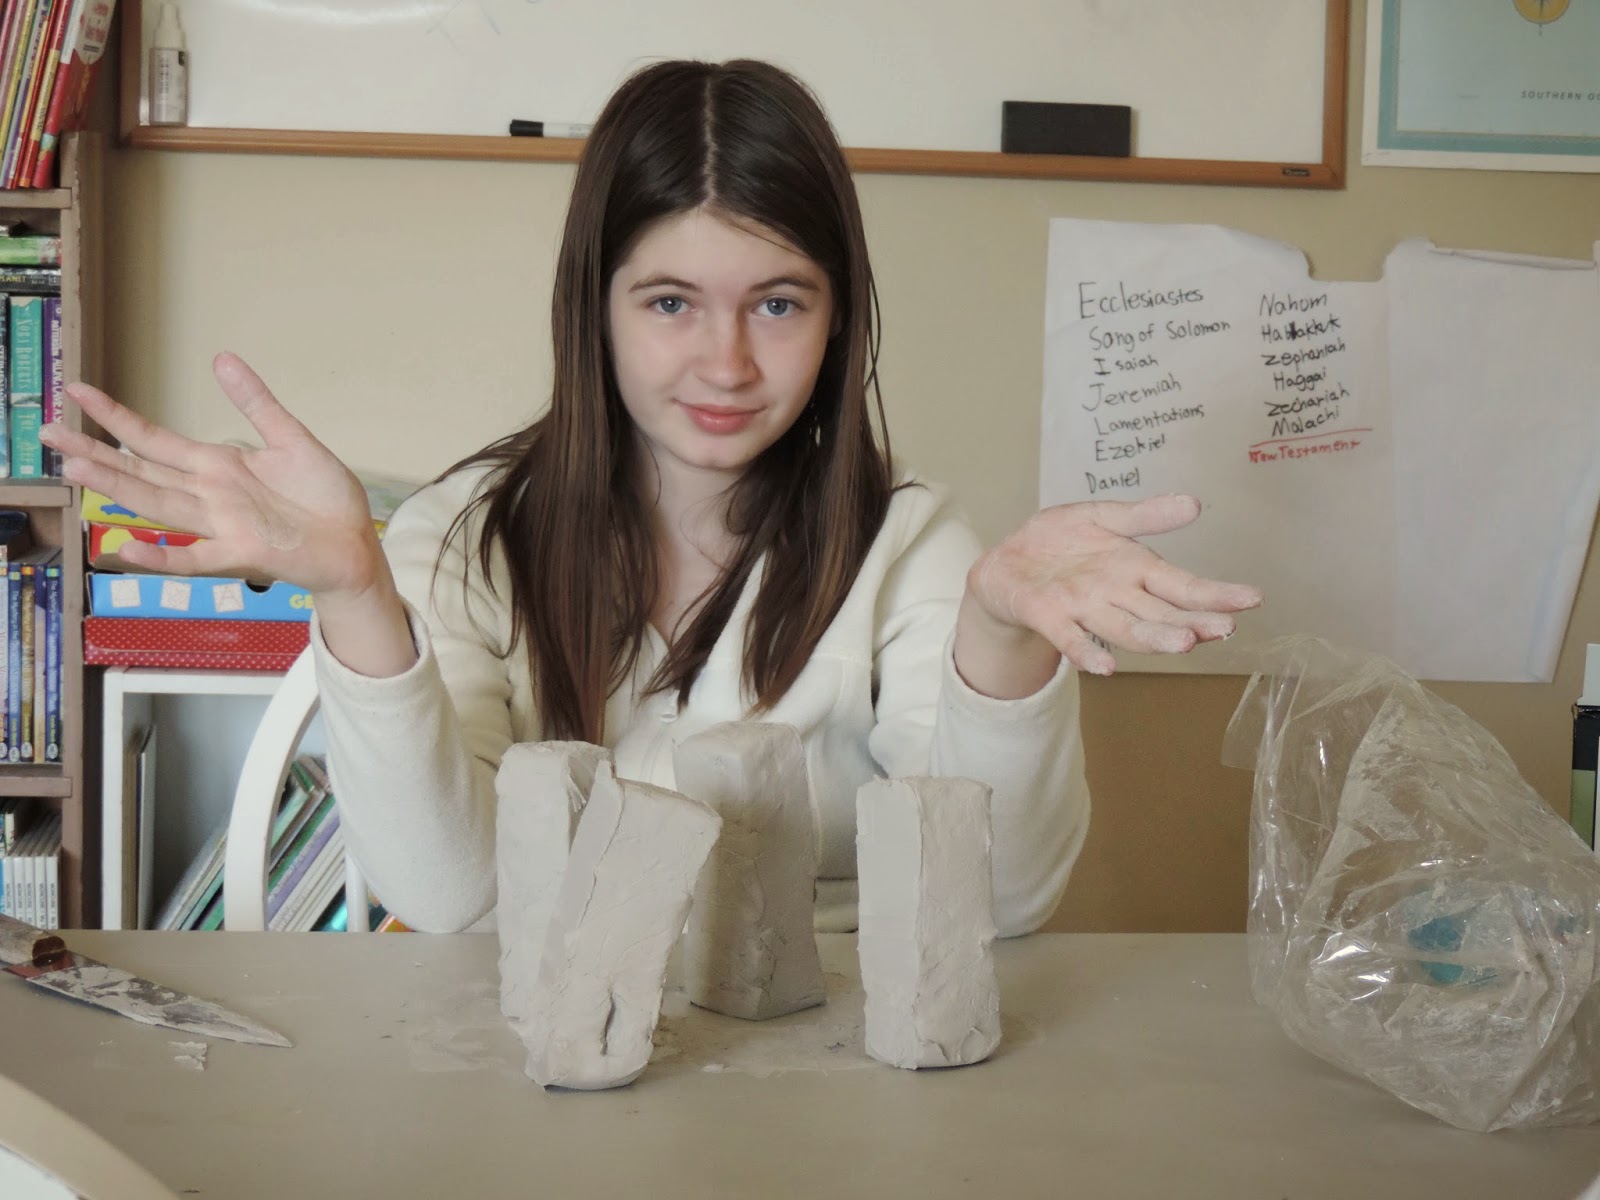
In Art Underground, we learned about Near Eastern Pottery.


It was back to working with clay, making figures.


We used cardboard tubes as the base for our figures.


Unfortunately, some of the "details" of Jack's figure fell off as it dried.  For me, this served to illustrate how amazing it is that some of these ancient relics have survived so many years.


ARTistic Pursuits has materials lists for each of their books, and I was able to order all my supplies easily online.


I ended up using a dedicated Thirty One bag just for our art review materials.  I liked being able to keep everything together, ready for our next lesson.


And I loved the new supplies and concepts that we were introduced to through this homeschool art curriculum.


Totally on her own, Brianna decided to make try creating some blended colors with the watercolor crayons.  This is actually a "key" that shows the various "recipes" she came up with, and the result of each.


You can see how she used some of those blends in her frame here.


ARTistic Pursuits has books for all ages, from Preschool through High School, and includes a variety of media, even their new Sculpture Technique books!


We have love, love, loved this review!  Even though we've only worked through 7 or 8 lessons so far, I feel we've learned new things.  This program is a great fit for our family, and I look forward to completing the rest of the lessons in the book.  If our curriculum for next year did not already include an art program, you can be sure I would be adding another ARTistic Pursuits book to my shopping list.


You can follow ARTistic Pursuits on Facebook, and you can read what other Crew families had to say about this and other books from ARTistic Pursuits by clicking the box below.

Click to read Crew Reviews
Crew Disclaimer
Top Mommy Blogs - Click To Vote! Thanks for clicking for us!

Monday, April 28, 2014

What to do with your Disney Pins after you get home

Pin trading is a fun part of the Disneyland experience.  But what do you do with all those pins, once you get home?  


Ah, Disney pins!  When I took Jack, we poured over the lanyards, selecting a pack that came with some pins to get him started.


This time around, lanyards and a pin came with our travel package, so we mostly bought "mystery" 2 packs for trading.  Because I'm cheap like that!

Little known fact:  When you spend X amount in ANY Disney store in the parks (pretty sure it's $30, but double check!), you can get a "completer" pin for only $2.95, making this your most economical way to get trading pins.  If the store you're shopping at doesn't offer completer pins, take your receipt to another shop that does have them.  One of the cast members told me this, and I'm so glad they did!  We got 4 pins for only $11.80 the day I bought t-shirts for the kids back home.

Oh, and another money saving tip?  I picked up Tinkerbell t-shirts for Hannah and Katie before we left for Disneyland and just brought them out with the rest of the pricey park shirts.


So we're home, and we've got pins.  Let's display them!  You'll need some foam board, a shadowbox, your free Photopass picture (or a printed copy of your favorite picture from the trip), your pins, and either fabric or paper for your background.


I asked the boys to help me pick which fabric to use, but you could also do a background of scrapbook paper, or even construction paper.  (Josiah picked the fabric I would have to iron, of course!)

A tip:  Disney fabric is cute, and you might think it would be fun to use Disney fabric for your Disney trip memories.  BUT, Disney fabric is very busy, and you need something fairly plain so your pins don't get "lost" in the print.


Now, the links above are for an 8x10 shadow box, and 8x10 pieces of foam board, which is borderline brilliant, but I tend to do things the hard way, so we're going to be custom cutting a much larger piece of locally purchased foam board.


I used the back of the frame to trace a guideline to cut on.  You want to cut inside your line a little if you're using fabric, to allow it to fold around the edges of the board.


I made a guide cut with my little blade, and then let Josiah hack through it with a serrated kitchen knife.


Cut your fabric a little larger than your foam board, then place the fabric face down, and place your photo face down on the back side of the fabric.  Use spray adhesive to cover the back of your photo, knowing that any overspray onto the backside of your fabric will help hold it in place on your foam board.


Carefully position your fabric, and then your photo.


You may want to artfully lay out your pins different ways before you poke them through, but having done this once before, I just sort of winged it.

Assemble by putting the loaded up foam board into the shadow box and putting the back on, and voila!


The finished project!  Ready to mount on the wall or set on a shelf and enjoy your Disney memories for years to come.


This was actually a repeat of my original brilliant idea from my trip with the girls in 2007.


And this is our shadowbox from that trip, which is a little dusty from being up on a shelf in Brianna's room.  Wow, my girls have changed a lot since then!


Top Mommy Blogs - Click To Vote! Thanks for clicking for us!