A large family, homeschooling, adoption, special needs, whatever strikes my fancy, sort of blog.

A large family, homeschooling, adoption, special needs, whatever strikes my fancy, sort of blog.

Wednesday, September 24, 2014

Sew Along: Make a Candy Corn Dress


Confession:  This was totally not my idea.  I saw a dress on Zulily last year and thought, "I could totally make that."  So I pinned it and forgot about it.

But not any more!  Time to move that pin from Sew This to Pinned It And DID It!  You do follow me on Pinterest, right?

Okay, so to make the Candy Corn Dress, you need a peasant top pattern.  I used a Simplicity pattern, because that's what I had on hand, but any peasant top or peasant dress pattern will do.  In fact, a quick search for "Free Peasant Top Pattern" shows plenty of hits, so you can get directions for making your own pattern, if you prefer.

I started with a dress for Hannah.  Now, I was using a size 4 pattern for my size 6 girlie, so I knew I'd have to add to it a little.  I placed my front and back pattern pieces 3/4" from the center fold of my fabric, and added about 3/4" to the sleeves.  I drew a line across my front and back pattern pieces where I wanted to shorten the bodice.  Hannah's line was 6" below the armpit, which seemed a bit long to me, so when I did Katie's, I shortened it up a LOT.  For Katie's size 4 dress (which is really more of a "tunic," since it's short) I drew the line 3" below the armpit.

Assemble the white bodice, all except on sleeve/side seam.  You're going to gather to the bottom while the dress is open on one side, but the front and back pieces are connected on the other side.


For the orange and yellow stripes, I cut 9" orange and 6" yellow for Hannah.  When I gather the snot out of something, I can get a bit more than 2.5 times the original length.  So I cut 2 strips, the full width of my 45" orange fabric, 9" high.  I cut several strips of yellow, not knowing how many I'd end up needing.

After sewing the two orange strips together, and all the yellow strips together, I set my serger to the narrowest double needle setting, turned the knife off, lengthened the stitch to the maximum, and set the gathers to maximum.  I ran the long orange strip through, then the long, long yellow strip through.

Next, I set the serger to the widest possible double needle setting, the idea being that we run over the first serged stitches, and they don't show.  It's a nice theory, anyway.  I sometimes have to hit a couple spots with the sewing machine afterwards to make stray serger stitches disappear.

You want your orange piece face up, with the previously serged edge going into the serger a second time under the white bodice, which is face down.  Keep the white fabric taut as you feed it, and allow the orange fabric to feed through faster, increasing your gather.

Cut off the extra orange when you reach the end of the white bodice.  Then flip the orange to face down, and serge the yellow face up underneath it.  Again, hold the orange layer taut and feed through the yellow generously as you serge.

You're almost done!

Sew the armpit/bodice seam all the way down the side, closing up the dress to the hem, and cutting off any extra along the side.


I decided to make the girls a couple of bows to go along with the dresses, and while I was working on those, I remembered having a cone of variegated serger thread that would be just perfect for this project.


The thread is orange/yellow/white.  I used it to do a rolled edge hem on the dresses.


Katie's dress went together even easier than Hannah's, because all the yellow layer was "leftover" from the first one, so it was pre-gathered.  Katie's orange stripe is not as tall as Hannah's, and I took off about 1/2" on the yellow when I hemmed it, and I think that shortening all 3 layers was a mistake, with such a small difference in size between the two of them.  Fortunately, Katie can wear hers with leggings or bike shorts.  She's cute enough to get away with a short skirt at this point.

The yellow fabric, I had on hand from something I was going to make last year and didn't.  I bought one yard each of the white on white (it's dots) and the orange.  I used 1/4" cotton elastic for the sleeves and necks.  Size 4 dress got 16" elastic at the neck and 10" at the sleeves.  Size 6 dress got 17" at the neck and 11" at the sleeves.


After the dresses were done, I decided the girls needed necklaces to go with them.  So Brianna and I stopped at JoAnn's after dropping Sam at football one Saturday and picked up some beads.


There's 3 sizes of the white/orange/yellow beads.  The two necklaces are different in sizes, but the same alternating pattern.  The spacers are silver tone, and the necklaces are strung on clear elastic cord.


I haven't had Katie try hers on yet, but Hannah looks like she's all ready for a trip to Apple Hill to pick out a pumpkin!


Shared at the Fall Linkup at:


Top Mommy Blogs - Click To Vote! Thanks for clicking for us!

Tuesday, September 23, 2014

Versatile Organizer from Children 'n Us - stroller or wheelchair


When I saw the opportunity to review a stroller organizer from Children 'n Us, I wondered if it would work for Luke's wheelchair.


After all, the pictures showed it on a bike, as well as a stroller, so I thought it might adapt to wheelchairs, too.


And it did!


This shows the organizer open on the back of Luke's wheelchair.


The parent/teacher communication notebook, his lunch, bib, change of clothes, and touchy feely book all fit in with room to spare (we send diapers to keep in the classroom, rather than on a daily basis).


And with the magnetic snap flap closed, to keep everything in place.


The organizer is durable and well made, and the straps are very adjustable.  After the first day, it was rubbing against the tires because it wasn't up high enough, so instead of fastening each side around a handle post, I fastened the clip from the left side to the right side, and now it's higher, so it stays out of the way of the tires.

It would be super easy to unclip the organizer and use it on our double stroller, if needed.


Currently on Amazon for $18.99 plus free shipping for Prime members, this bag comes with a money back guarantee.

I received one or more of the products mentioned above for free using Tomoson.com. Regardless, I only recommend products or services I use personally and believe will be good for my readers.  This post contains affiliate links.  

Top Mommy Blogs - Click To Vote! Thanks for clicking for us!

Monday, September 22, 2014

Alpha Omega Lifepac curriculum review


Our family was so blessed to be able to review for Alpha Omega Publications!  This was literally an answer to prayer, as I was needing a math program for Jack when this opportunity came up.

Math?!

Alpha Omega offers curriculum in 4 different lines:  Monarch, Switched on Schoolhouse, Lifepac, and Horizons.  We received 5th grade math from their Lifepac line.  This retails for $61.95.


There are 10 workbooks or Lifepacs to a school year.  It took Jack 4 weeks to get through the first Lifepac, but that was partially due to a slow start with school the first week.  I had him do 2 pages per day so we could ease back in to schoolwork.  By week 4, we were up to 4 pages per day.


In addition to the 10 student workbooks, the boxed set comes with a Teacher's Guide.  This is a really nicely done resource!  It's the score key for the workbooks, and it also includes an overview of all the math concepts taught in each Lifepac, for each grade, K-12.  This is really helpful, because if your child missed learning a key math concept in another program, you know just what Lifepac to order to teach that concept.  (Lifepacs are available individually, as well as in sets, for your convenience.)

In addition (no pun intended!) the Teacher Guide has a section of record keeping pages that you can duplicate for personal use.  If you have more than one child that is going to use this program, the Teacher Guide can be reused with a set of 10 Lifepacs purchased without the guide for $52.99.

The Teacher Guide contains a section of math term definitions, for those of us who might be a little rusty at what an ordinal number is.  It also includes additional activities for taking math off the page in fun and engaging ways.


Before you give a fresh, new Lifepac to your child, you remove the end test from the center of the workbook.  After they complete all the learning sections in the Lifepac, there is a pretest at the end of the workbook.  When you score this, you can see if there's anything they need to go back and brush up on prior to taking the final test.


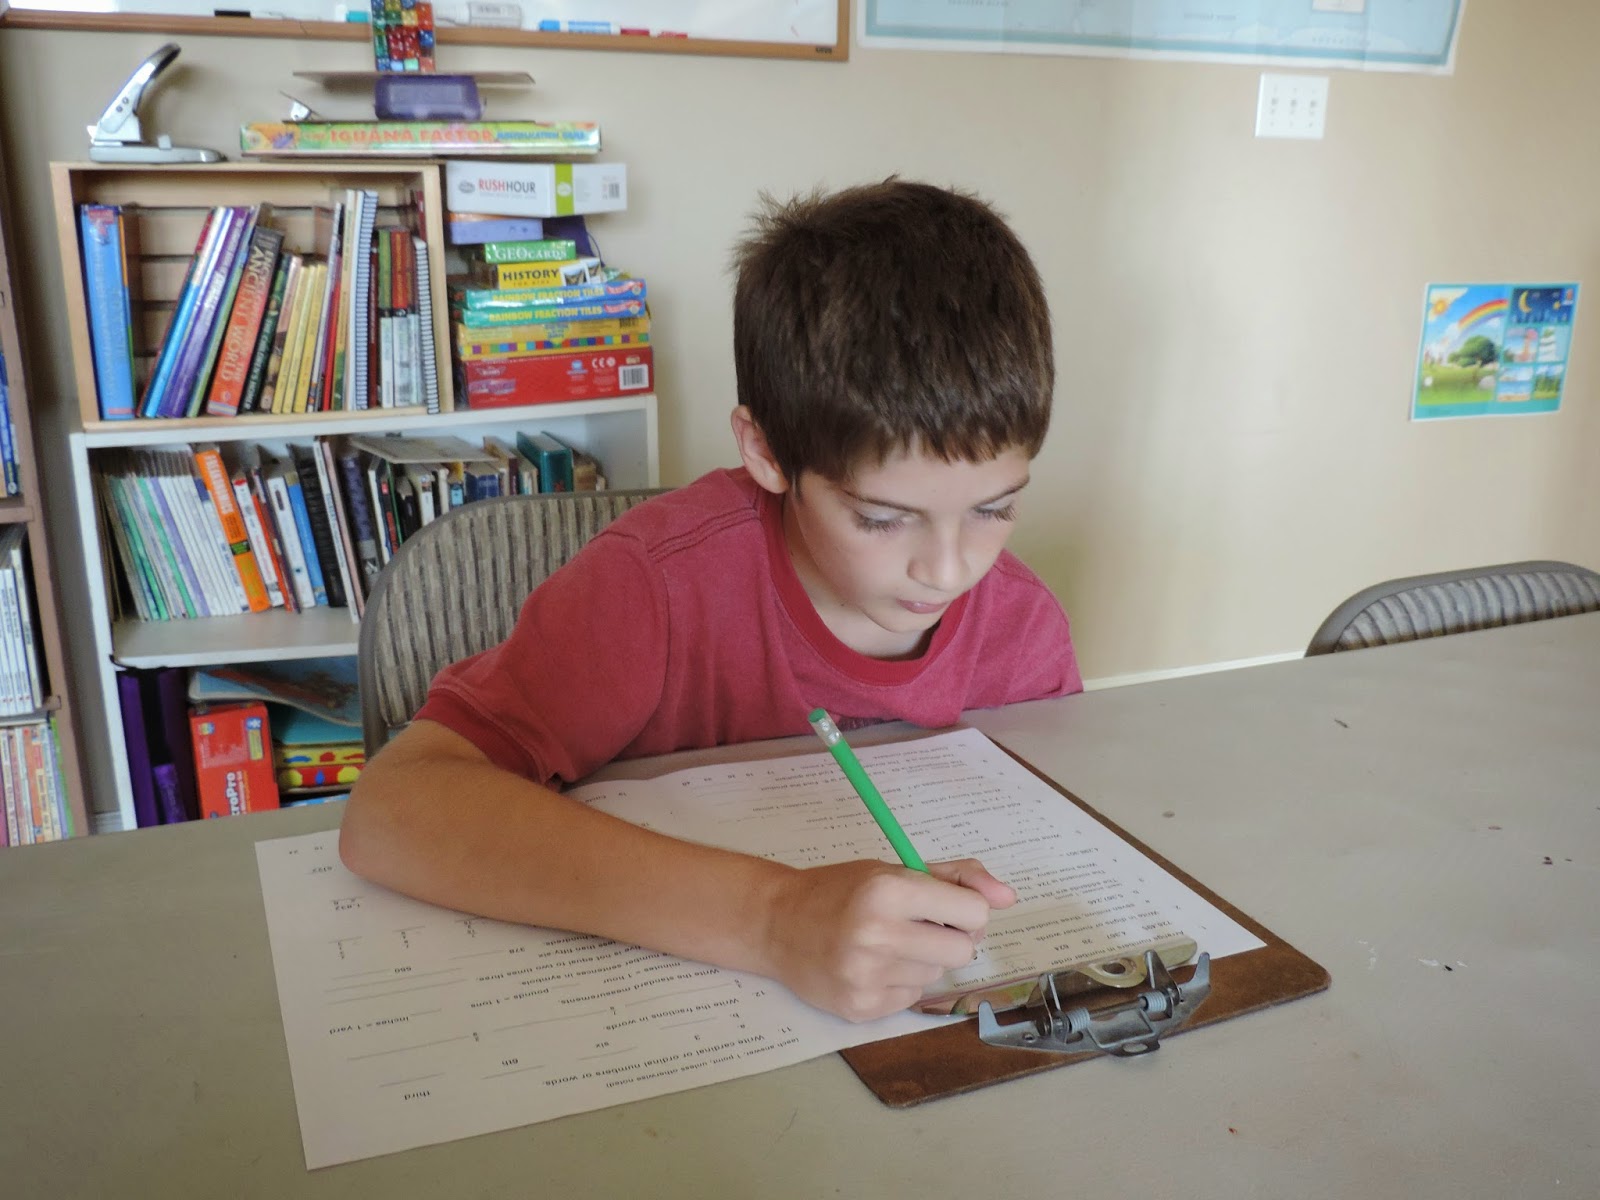
Here's Jack, taking the final test for Math 501.  He got an 82%.


One of the features I really appreciate about this program is that the Teacher Guide includes Alternate Tests, for when a student bombs a Lifepac Test.  The standard in our house is 80%.  If you get lower than 80%, you haven't mastered the material, or you weren't being careful.  Either way, you need to retest, or possibly repeat the workbook.  (We used a workbook based program several years ago.)  If you have an advanced student who looks through a Lifepac and says, "I already know all this stuff!" you could have them take the Alternate Test from the Teacher Guide as a Pretest and then allow them to skip to the next Lifepac if they truly have mastered the material.  I recommend having your child take the placement test online prior to ordering so you know exactly which Lifepacs they need.

In summary, Alpha Omega Lifepacs are an economical, easy to administrate program.  Besides Math, they offer Bible, History & Geography, Language Arts, Science, and several electives.  Because the student can work in Lifepacs on their own, they are great for large families with students working at several different levels.  They're also a good option for students who like to work independently.

Military Families:  Alpha Omega offers you a special discount as a thank you for your service.

Don't forget we have a fabulous GIVEAWAY for Alpha Omega products and a bonus Amazon gift card!


Top Mommy Blogs - Click To Vote! Thanks for clicking for us!

Sunday, September 21, 2014

Evergreen


Evergreen: A Christiansen Winter Novella was such a touching little book!  Being a "novella," Evergreen is 181 pages of story, and then discussion group questions, if you are reading it with a group.  If you're familiar with Susan May Warren's Christiansen series, including It Had To Be You and When I Fall In Love, you'll recognize John & Ingrid, and many of the other characters.


I loved that, instead of the young love stories we usually read, this book was about a mature couple, who'd raised their kids, and was facing the empty nest.  Now, I won't have an empty nest for many years to come, but I can relate to being in a season of life where the kids are starting to live on their own.

One of my favorite interactions takes place on pages 44-45, between John and his son Derek.  They're working together on Derek's house, and John makes reference to Naked Tuesday as a perk of having an empty nest.  Derek, of course, is horrified.  Living with a flock of teenagers, I've noticed that they think sex is fascinating--unless it involves their parents!  Then, it's totally gross.

During preparations for the very memorable Live Nativity comes a deep observation from Ingrid's friend Noelle.  "Our children are destined to leave us from the moment they're born.  And the paths they walk are theirs, not ours.  We can only give them a place to come, stop in, find comfort."  Wise words.

Evergreen is a story of loss and gain.  A story of new beginnings and the continued faithfulness of a long term marriage.

Top Mommy Blogs - Click To Vote! Thanks for clicking for us!

Saturday, September 20, 2014

Hidden in the Stars book review and GIVEAWAY


Usually, when I read fiction, I start a book, read through it, and finish before picking up another fiction book.  Recently, I started a book, and was having a hard time plowing through it.  Since I had other books in my review pile, I decided to do something daring and set the book aside, unfinished, and read something else.  The "something else" I picked up was Hidden in the Stars, from the Quilts of Love series I've talked about before.

Hidden in the Stars was written by Robin Caroll, an author I haven't read before.  This ended up being one of my favorites from this series (the other favorite being Rival Hearts).

The book starts off with a young gymnast waking up in the hospital after a severe beating during a home invasion.  We can forgive the author's predictability in having something flare up between the victim and the detective, because the rest of the tale is quite intriguing.  It's really the story of 3 generations of strong women.  Threads of determination, sacrifice, and talent run through the story.

Detective Frazier would do well to note that both grandmother Alena and mom Nina have made some pretty bad choices in life before losing his heart to daughter Sophia.  In fact, Sophia only gets her grandmother for a very short time between when she discovers that her mother lied to her her entire life about her grandmother being dead, and when her grandmother is shot by the same people who put Sophia in the hospital.

I liked this book because, rather than being the typical romance story, it was more of a mystery, which is my favorite genre.


Don't miss the newest Quilts of Love book, Hidden in the Stars by Robin Caroll. September's QOL release is a wonderful combination of mystery, romance, and family love bound together by a quilt and the story it tells.

Hidden in the Stars Robin Carroll Quilts of Love

Enter to win a "Night on the Town" (a $200 Visa cash card!) and RSVP for the "Fall into Fall" Quilts of Love Facebook party on 10/7.
One winner will receive:
  • A $200 Visa cash card (The perfect accessory for a "night on the town"!)
  • A Grand Design by Amber Stockton
  • Hidden in the Stars by Robin Caroll
Enter today by clicking one of the icons below. But hurry, the giveaway ends on October 7. Winner will be announced at the October 7th author chat party with Amber Stockton and Robin Caroll! RSVP for an evening of book chat, quilting tips and tricks, prizes, and more!

RSVP today and spread the word—tell your friends about the giveaway via FACEBOOK or TWITTER and increase your chances of winning. Hope to see you on October 7th!


Top Mommy Blogs - Click To Vote! Thanks for clicking for us!

Friday, September 19, 2014

Our Fourth Week of School


Lots of fun going on this week!  


Mondays are co op.  Here's Jack's art class.


Since Hannah is off track, she came with us.


The art classes made Mondrian inspired shoes.


These are Eli's.


In Science, the kids are learning about the states of matter.  These test tubes represent solid, liquid and gas.


Paul took Hannah and Katie to the firehouse one day for a promotional ceremony, so I took Jack & Eli out to lunch while Luke was at school.


Eli had "rescued" some Subway coupons that came in the mail from the recycling, and he kept bugging me to go use them.  So I gave him some money and he paid for his $5 lunch deal with one coupon, while I used another one to get Jack and I a B1G1F deal.  Lunch ended up being $12 for 3 people.  Homeschoolers turn everything into a learning opportunity, right?  


Since the curriculum we're doing this year is called Rome to the Reformation, we had a Roman Soldier visit the class.


Not about to let Jack have all the fun, Eli took a turn dressing up, too.  (And yes, it was really hard to reign them back in to do more schoolwork after this!)


We read about Roman mosaics and frescoes, and so we made dragon mosaics.


Fierce dragon mosaics.  The boys hung these up on their bedroom wall.


Having Hannah home, I try to do some "schooly" stuff with the girls, just to break up the constant playtime (that leads to screaming after a while).  On this day, we made autumn fingerprint trees.


I thought they turned out cute.  I found the girls an apple craft, too, that I'm planning to let them do over the weekend.


Did you catch my Favorite Autumn Books for Children post?  Time for reading about pumpkins and apples and farms and Columbus.

I had a hard time getting in the homeschool groove this morning, so we're going to watch Drive Thru History Rome and Greece (affiliate link) over the weekend so that I feel like we got enough in this week.  We're not quite done with Week 4 in our book, but we're catching up quickly.

Only 16 more weeks until we hit CASTLES!  I have a couple projects up my sleeve that I'm really looking forward to when we get to that point.  In the more immediate future, however, we're going to be trying out some treasure hunts, which should be a lot of fun.  I picked up a couple little treats last night at Target to put at the end of 2 of the hunts, and I have something really neat planned for the final one.

Linking up at:

For the Display of His Splendor

Top Mommy Blogs - Click To Vote! Thanks for clicking for us!