I'm having so much fun with our Chinese New Year crafts! If you're following my Chinese New Year board on Pinterest, this project may look familiar to you. I gave it my own little twist, of course, but the idea is the same.
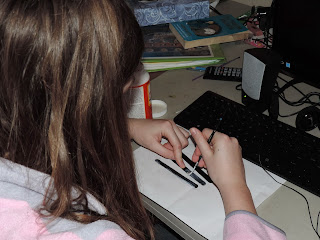
Remember last week when we were painting the peg dolls and I had the kids each paint 4 craft sticks black? Now it's time to see what those sticks were for! (My kids thought I was SO mean, not telling them what we'd be doing with them.)
I started the kids out by having them apply a layer of glossy Mod Podge to their painted sticks to make them shiny like lacquer. Which led to a conversation about what lacquer was, and a peek at some Google images. I love exploring our world with my children!

When you paint Popsicle sticks, hold the middle and paint the ends first. Then you can bump them up against a fingernail while you paint the middle. Just a little trial and error hint.
Over the weekend, I pulled up the coloring page I had pinned, opened the image in PicMonkey, cropped it into a square, and arranged it to print 4 on a page. Then I printed onto red paper.
I used my paper slicer to separate them and gave the kids the option of painting or coloring with marker their Chinese character for "good fortune." Painting, of course, would be more historically accurate, but coloring has more control. Brianna chose painting, the boys chose marker.
However, once the paint was dry, she decided it was too gray, so she went over it with Sharpie.
While the kids worked, I explained to them that the character they were coloring meant prosperity or good fortune. It is common to wish people good fortune in the coming year. However, my spin on it was that we should be wishing people well in our actions, not just as a holiday ritual. We should help bring about the good fortune of others. We discussed some ways we can do this, both on a small, personal scale, at home, and on a grander, looking to serve others, scale as well. These signs are to serve as a reminder to be good fortune to the people around us.
After coloring/painting the character, we glued the sticks on. First, glue on the edges of the left and right sides and carefully drop the sticks in place. Try not to glue your project to your work surface. Then apply glue dots at the ends of the top & bottom sticks laid across the side sticks. Then we added a Chinese Good Luck Coin .
.
Once all the glue was dry, our final step was to add a Red Satin Cord hangar to the back.
Brianna and I tried to make some fancy knots for our hangars. I think I need to find some YouTube tutorials. My knot looked like a bunny spawned near a nuclear power plant.
My finished "good fortune" sign hangs over my desk.
Brianna's finished project.
Eli did a paracord weave with his satin cord, and then hung the finished project from a suction cup in the school room window.
And Jack's finished sign.
A simple project with easy to acquire materials to honor the heritage of the youngest members of our family and also remind us to be kind? Win win.


Great craft. I like how your daughter chose to be more historically accurate. A true risk taker.
ReplyDeleteShe's my artist. :)
DeleteGreat job! I love the suction cup idea :)
ReplyDeleteWe had those left from when the kids used to make Perler Bead creations and hang them in the windows. :)
DeleteMy 8 year old is fascinated with China, so I pinned this for her :) Thank you for sharing!
ReplyDeleteChina's a pretty amazing place! I'm anxious to take my girls back for a visit someday.
DeleteThose signs are fantastic! I think we'll give them a try next year, I'm pinning until then!
ReplyDeletePlenty of time for this year. Chinese New Year begins 1/31, and runs 15 days. (Which, personally, I love, because it means we can have our celebratory meal on a day when dh is home and it's not considered "late.")
DeleteThis is a neat Chinese New Year activity! I chose this post as one of my favorites from last week's Hearts for Home Blog Hop. Thanks for linking up, and feel free to stop back by and grab an "I Was Featured" button! http://learningtable.blogspot.com/2014/01/hearts-for-home-blog-hop-50.html
ReplyDeleteThanks for hosting the linkup, Anne! I've found some neat ideas from the other bloggers there. :) I'm loving the free sheet music lady, in particular, since Brianna is learning to play piano.
DeleteIn my childhood i remember I used to make wooden tables and small furniture items from woodpaintsticks.com/wood-craft which is 12" Strong Clear White Birch (Hardwood Veneer) and Made for Mixing Paint and Other Protective Coatings
ReplyDelete